Difference between revisions of "Creating Content"
m (Jake moved page Creating a Picture or Rug to Creating Content) |
|||
| Line 48: | Line 48: | ||
::::::[[File:Finishedproduct2.jpg|650px]] | ::::::[[File:Finishedproduct2.jpg|650px]] | ||
| + | |||
| + | To create custom walls and floors, select the room to be customised to bring up the room information tab and select the “Customise” button. | ||
| + | |||
| + | ::::::::::::::[[File:Wallcustomisebutton.jpg|300px]] | ||
| + | |||
| + | |||
| + | This will open the “Room Customisation” menu. Selecting the [[File:Workshopbutton.jpg|35px]] button will open the user generated content menu for creating a wall or floor. | ||
| + | |||
| + | ::::::[[File:Workshopicon3.jpg|650px]] | ||
| + | |||
| + | |||
| + | This is the user generated content menu for creating a wall or floor. | ||
| + | |||
| + | ::::::[[File:Wallmenu.jpg|650px]] | ||
| + | |||
| + | |||
| + | The type menu can be used to select if the user creates a wall or floor. | ||
| + | |||
| + | ::::::[[File:Walltype.gif|650px]] | ||
| + | |||
| + | |||
| + | Selecting the blank boxes or the [[File:Openfilebrowser.png|35px]] button will allow the user to upload images to be used in their custom made items. | ||
| + | |||
| + | The icon image will automatically match the main item image, however users can change the image by pressing the [[File:Openfilebrowser.png|35px]] button in the icon image section. | ||
| + | |||
| + | |||
| + | Once the image has been uploaded users can adjust the image to their liking using the [[File:Imageselectionbutton.png|35px]] and [[File:RotateImagebutton.jpg|35px]] buttons. | ||
| + | |||
| + | |||
| + | The [[File:Imageselectionbutton.png|35px]] button allows the user to select the area of the uploaded image to be seen in the custom item. By using the box provided the user can zoom in and out, or move the box to select which area they wish to be seen on their wall or floor. Once the desired area is selected, press the [[File:Imageselectionbutton.png|35px]] button again to confirm the selection. | ||
| + | |||
| + | ::::::[[File:Wallimageselector.gif|650px]] | ||
| + | |||
| + | |||
| + | The [[File:RotateImagebutton.jpg|35px]] button will rotate the item. Users can also rotate the icon image using the same button in the icon image section. | ||
| + | |||
| + | ::::::[[File:Wallrotation.gif|650px]] | ||
| + | |||
| + | |||
| + | The user can edit the the Name and Description of their item using the text boxes provided. | ||
| + | |||
| + | ::::::[[File:Walldescription.gif|650px]] | ||
| + | |||
| + | |||
| + | The “Kudosh” slider can be used to adjust the amount of Kudosh needed to unlock the item. | ||
| + | |||
| + | ::::::[[File:Wallkudosh.gif|650px]] | ||
| + | |||
| + | |||
| + | Once all options have been chosen select the “Create” button and the customised content will appear in the room customisation menu. Users will need to unlock their custom made wall or floor using Kudosh before they can use it in their hopsital. | ||
| + | |||
| + | ::::::[[File:Wallcreatebutton.jpg|650px]] | ||
| + | |||
| + | ::::::[[File:Finishedproduct1.jpg|650px]] | ||
Revision as of 15:39, 7 February 2019
The user generated content menu can be accessed via the items menu to create rugs and pictures by selecting the ![]() icon.
icon.
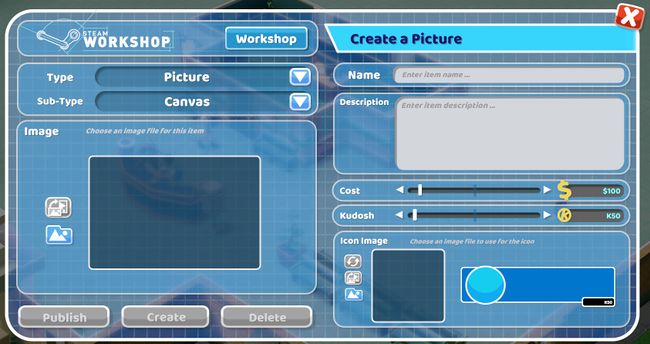
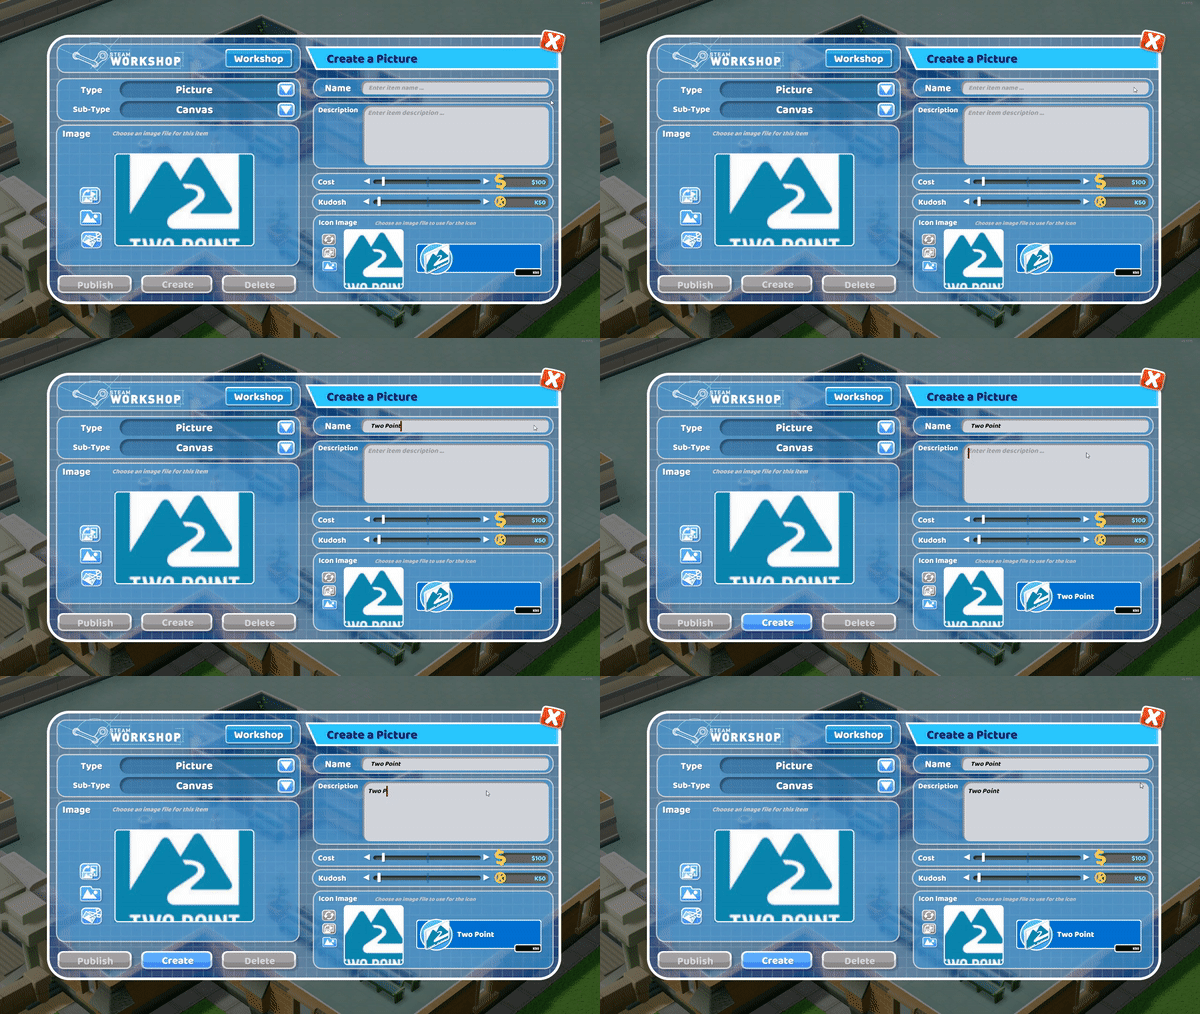
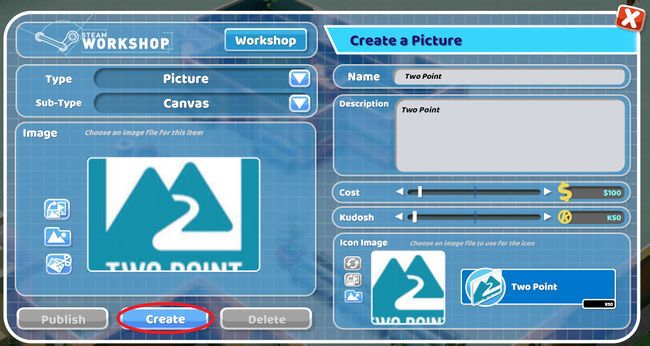
This is the user generated content menu for creating a rug or picture.
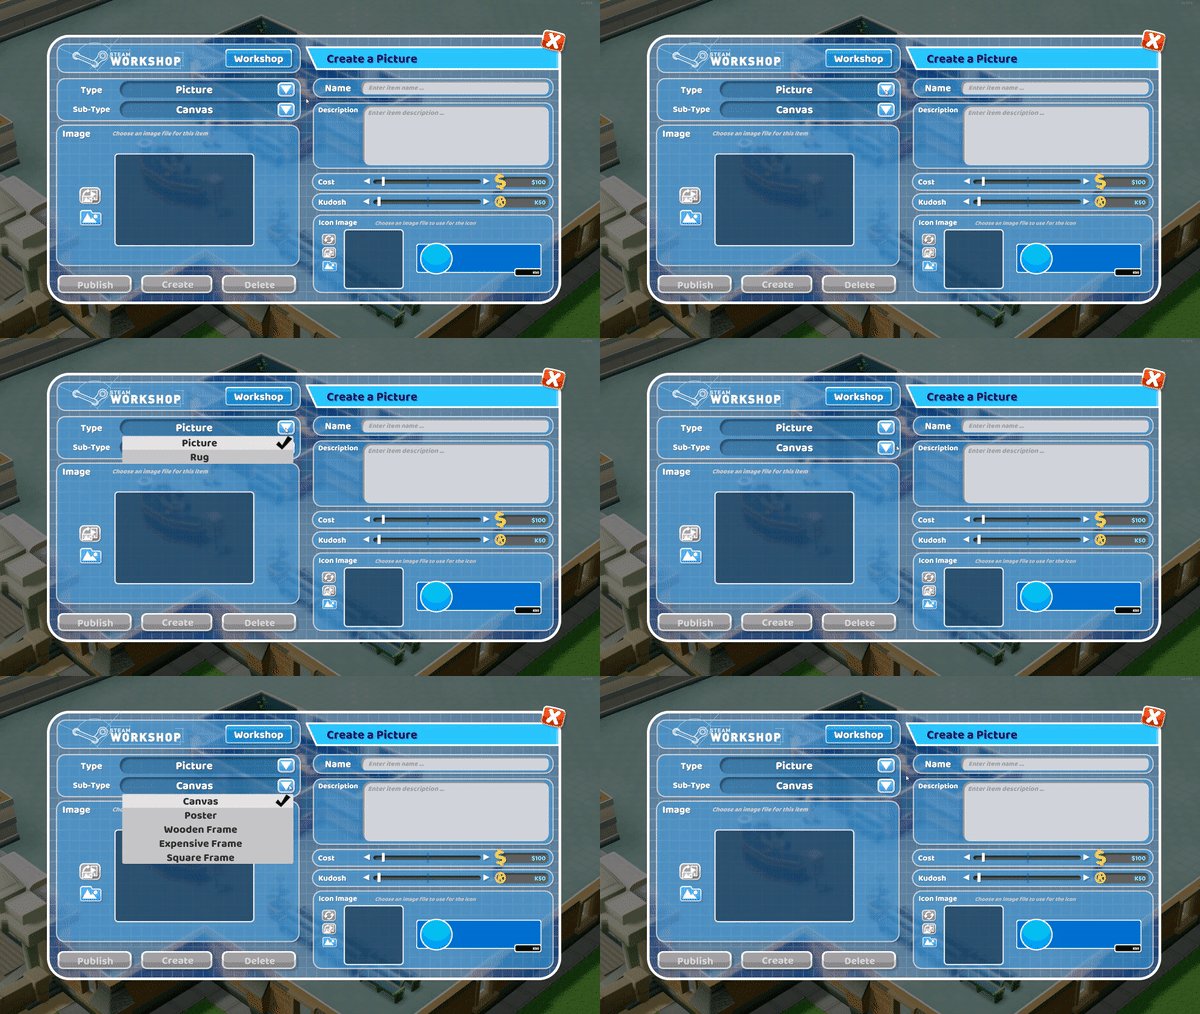
The Type and Sub-type menus can be used to select what type of item the user wishes to create.
Selecting the blank boxes or the ![]() button will allow the user to upload images to be used in their custom made items.
button will allow the user to upload images to be used in their custom made items.
The icon image will automatically match the main item image, however users can change the image by pressing the ![]() button in the icon image section.
button in the icon image section.
Once the image has been uploaded users can adjust the image to their liking using the ![]() and
and ![]() buttons.
buttons.
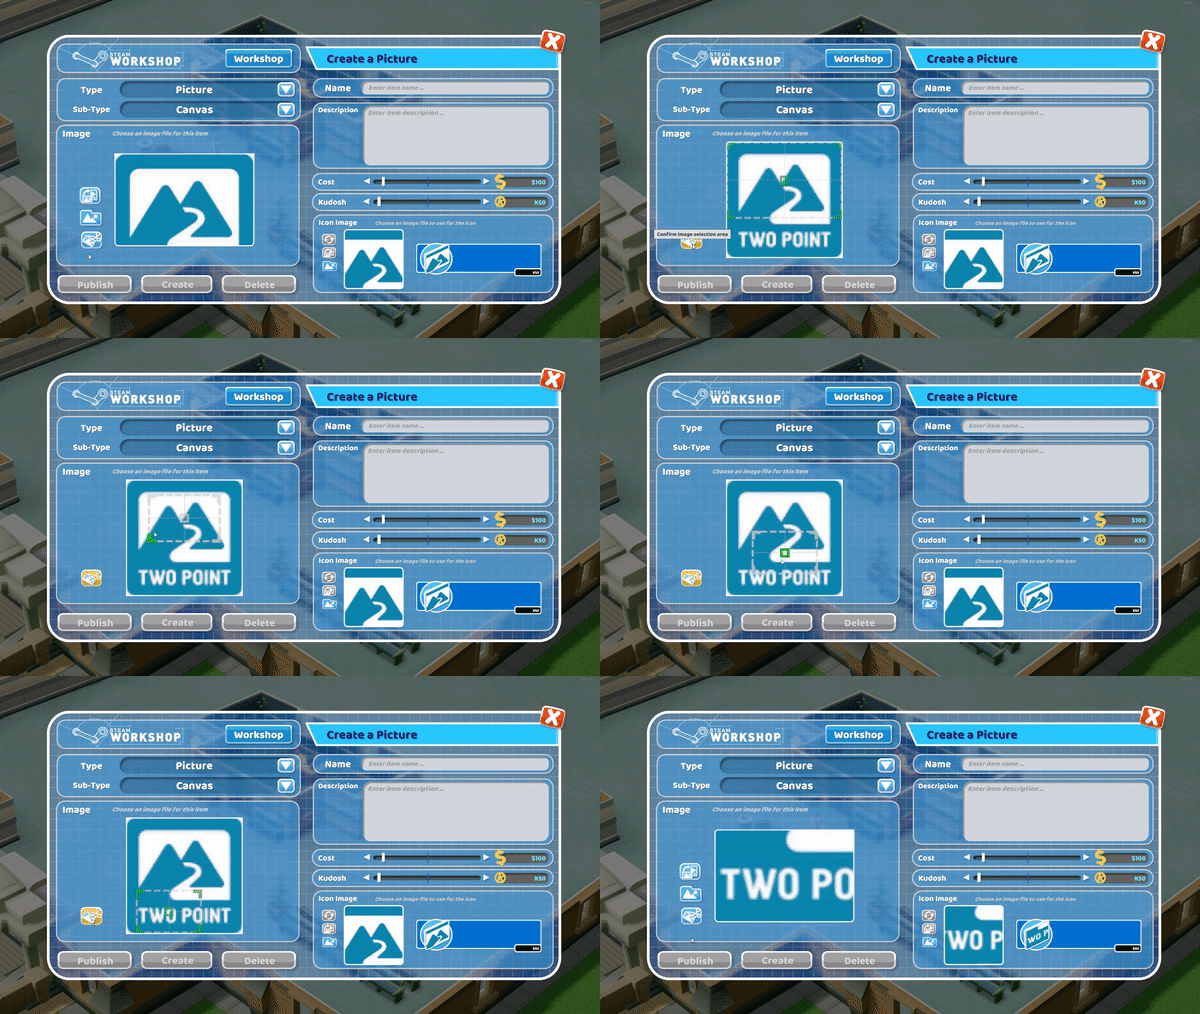
The ![]() button allows the user to select the area of the uploaded image to be seen in the custom item. By using the box provided the user can zoom in and out, or move the box to select which area they wish to be seen on their custom created item. Once the desired area is selected, press the
button allows the user to select the area of the uploaded image to be seen in the custom item. By using the box provided the user can zoom in and out, or move the box to select which area they wish to be seen on their custom created item. Once the desired area is selected, press the ![]() button again to confirm the selection.
button again to confirm the selection.
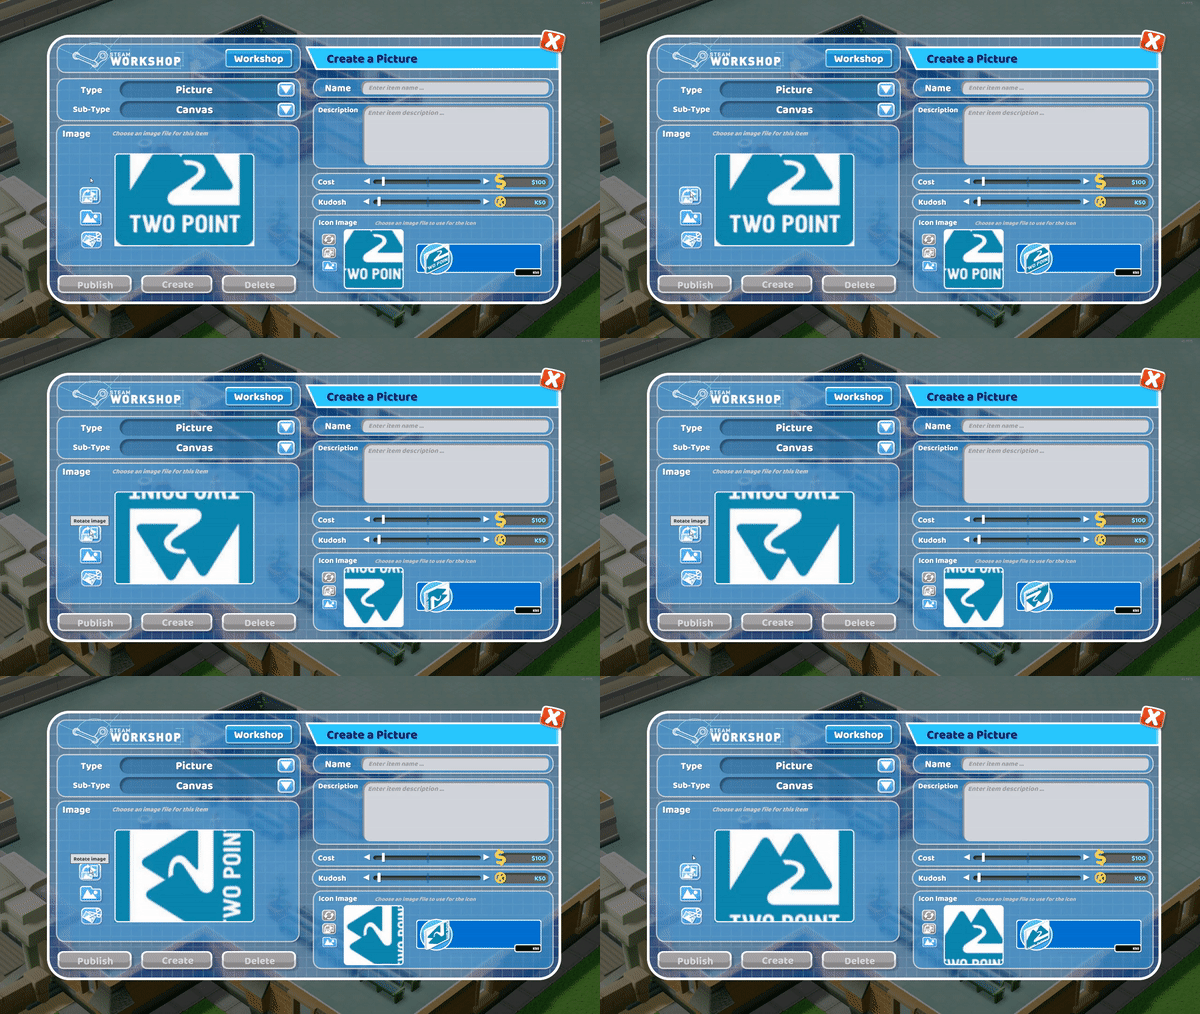
The ![]() button will rotate the item. Users can also rotate the icon image using the same button in the icon image section.
button will rotate the item. Users can also rotate the icon image using the same button in the icon image section.
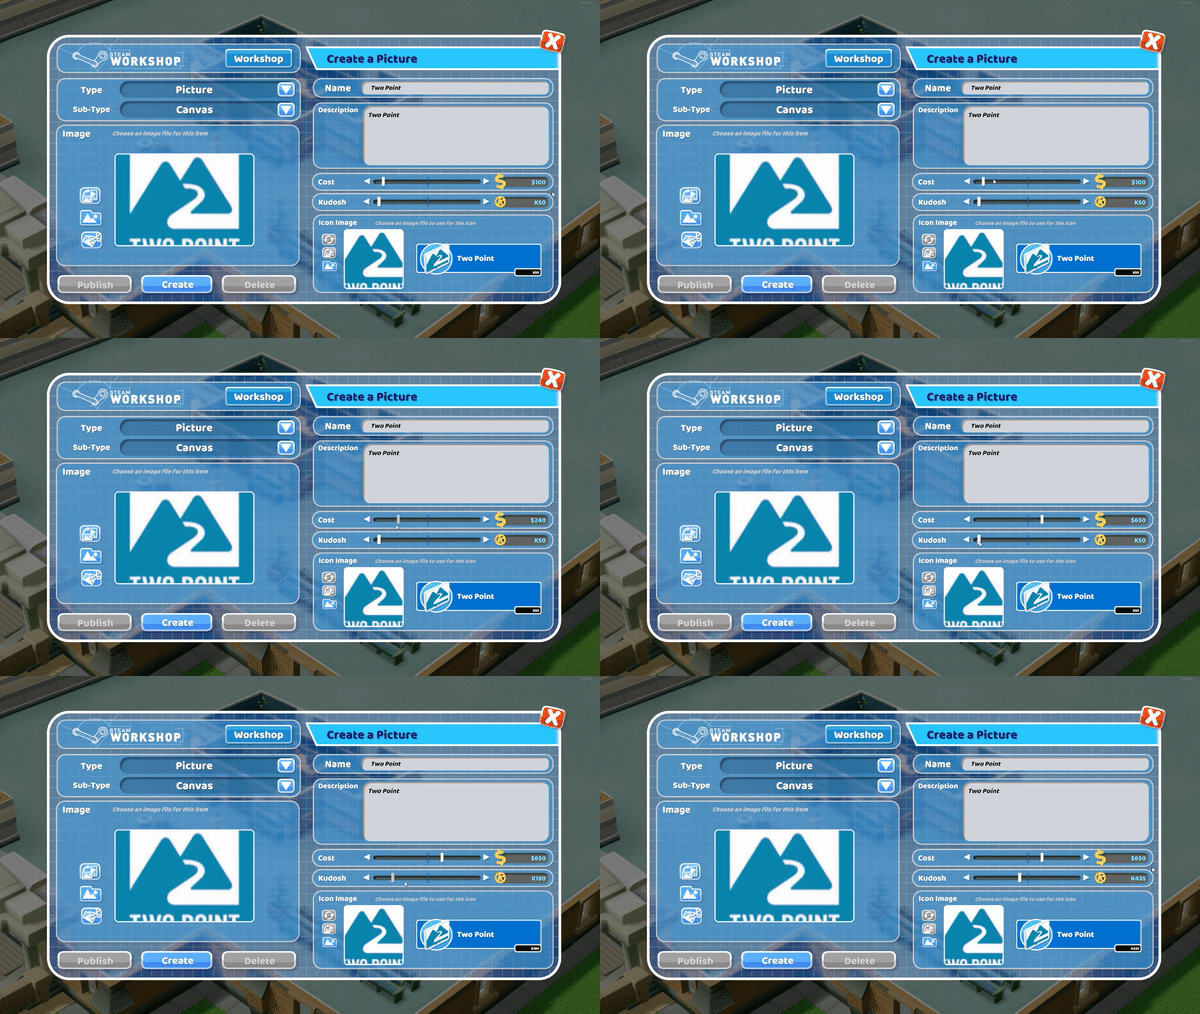
The user can edit the the Name and Description of their item using the text boxes provided.
The “Cost” and “Kudosh” sliders can be used to adjust the amount of Kudosh needed to unlock the item and the cost of the item to place in the hospital.
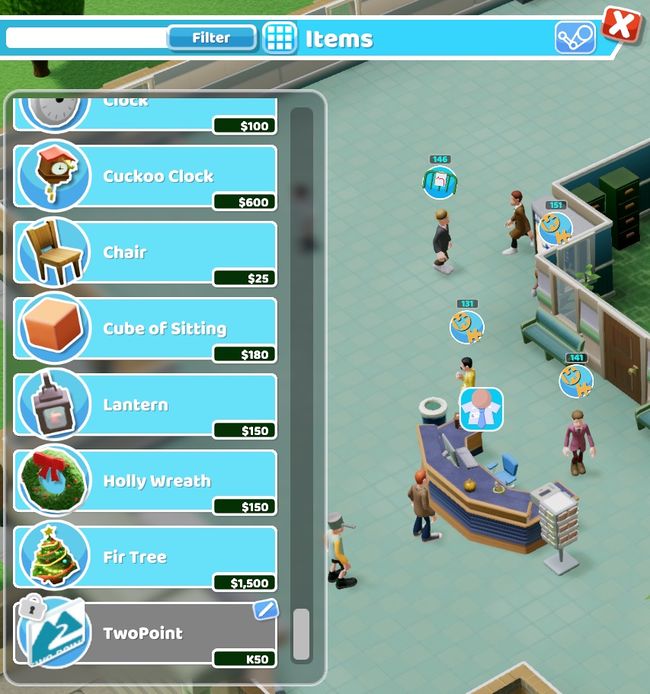
Once all options have been chosen select the “Create” button and the customised content will appear in the items menu. Users will need to unlock their custom created items using Kudosh before they can use it in their hopsital.
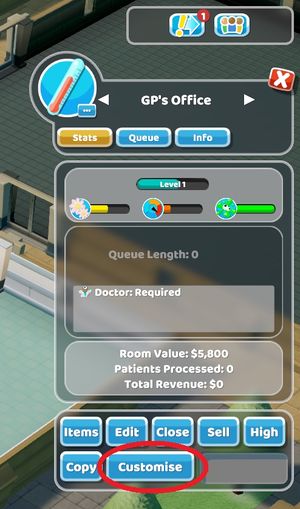
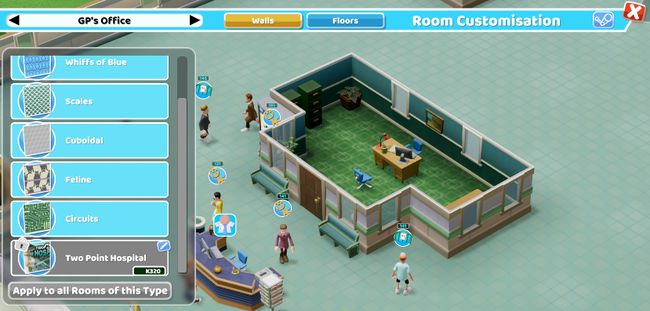
To create custom walls and floors, select the room to be customised to bring up the room information tab and select the “Customise” button.
This will open the “Room Customisation” menu. Selecting the ![]() button will open the user generated content menu for creating a wall or floor.
button will open the user generated content menu for creating a wall or floor.
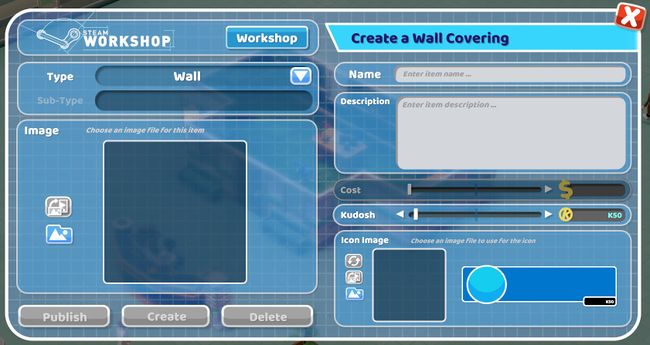
This is the user generated content menu for creating a wall or floor.
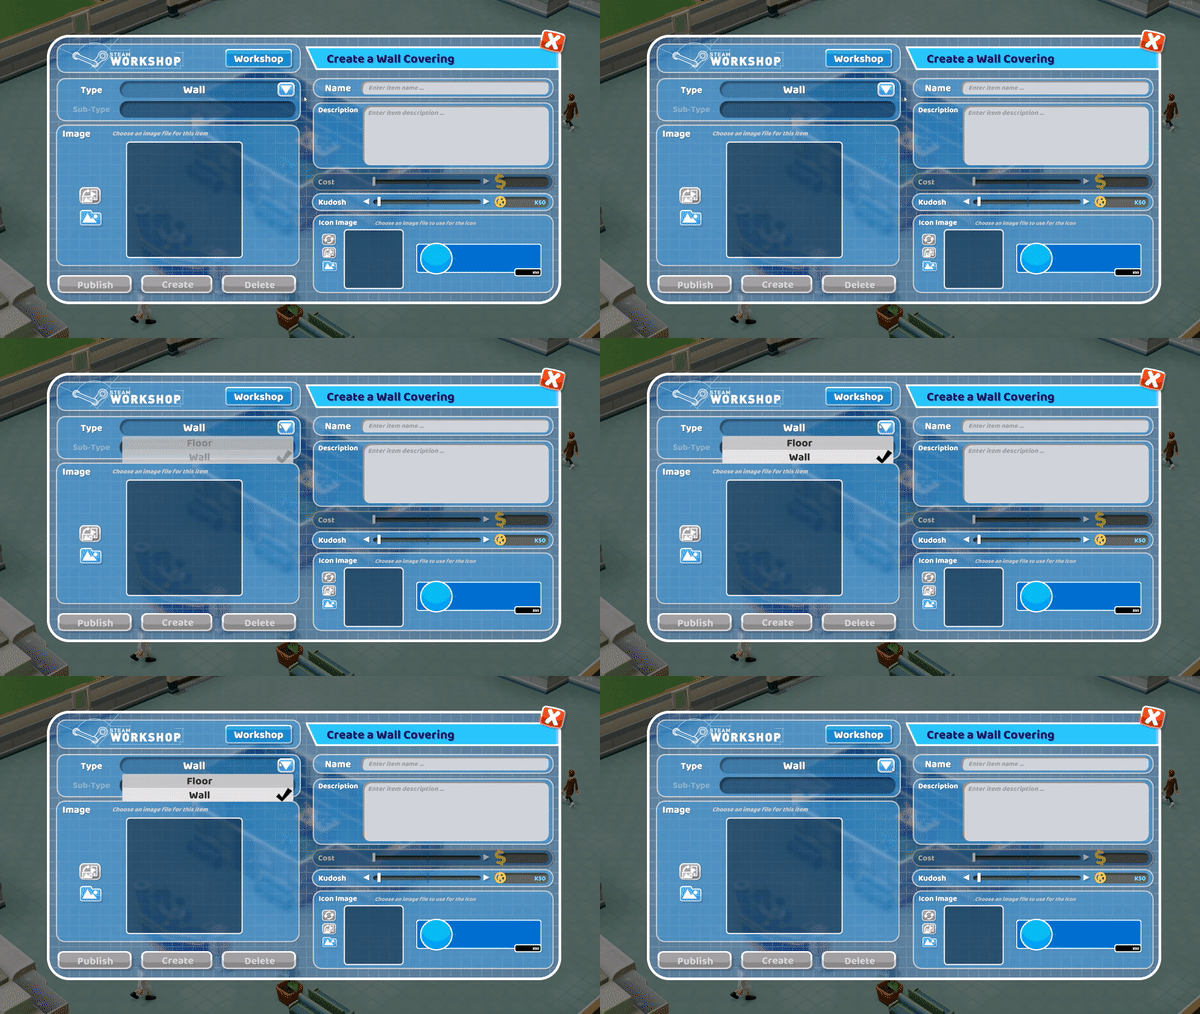
The type menu can be used to select if the user creates a wall or floor.
Selecting the blank boxes or the ![]() button will allow the user to upload images to be used in their custom made items.
button will allow the user to upload images to be used in their custom made items.
The icon image will automatically match the main item image, however users can change the image by pressing the ![]() button in the icon image section.
button in the icon image section.
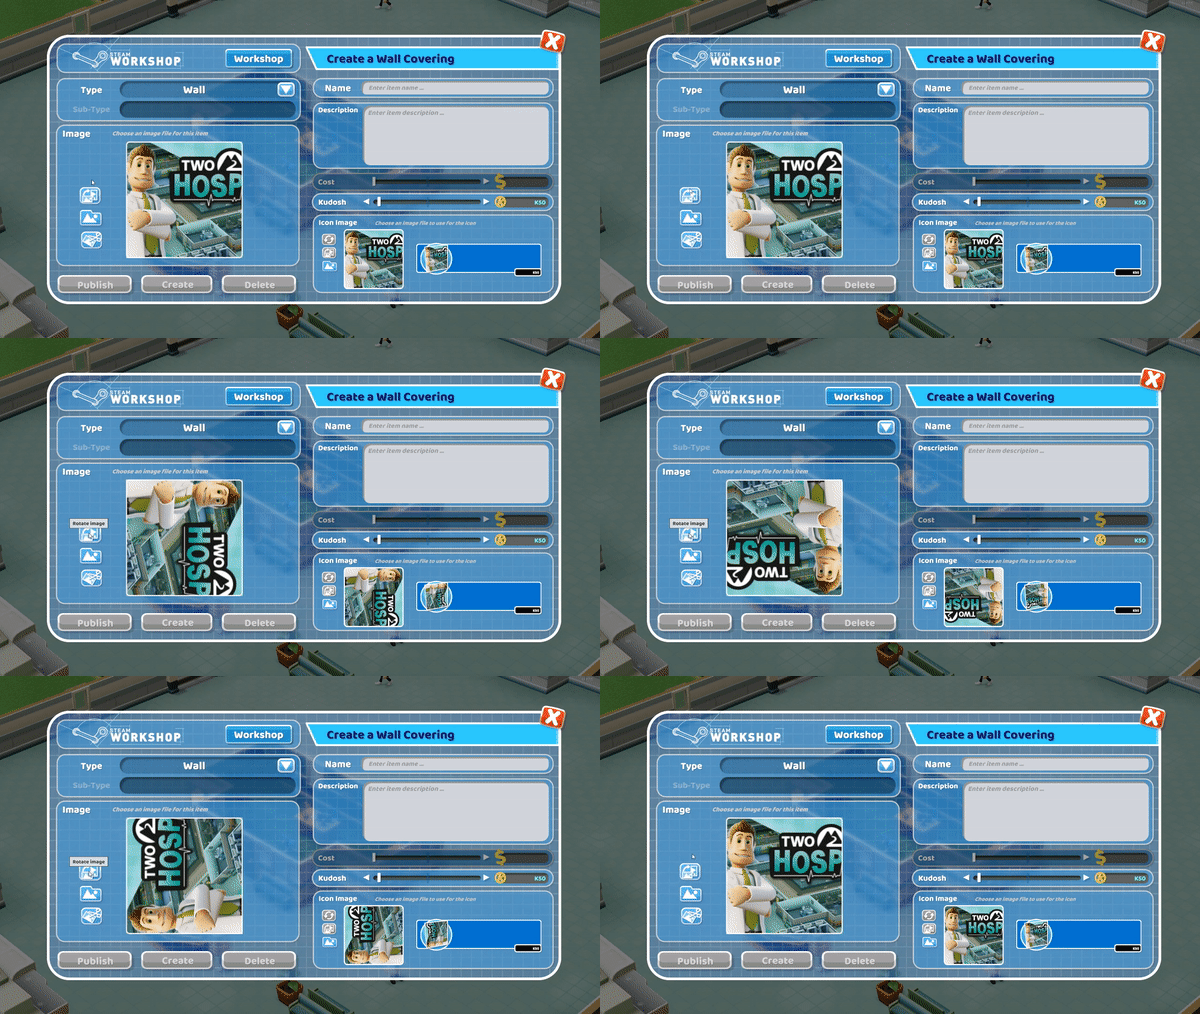
Once the image has been uploaded users can adjust the image to their liking using the ![]() and
and ![]() buttons.
buttons.
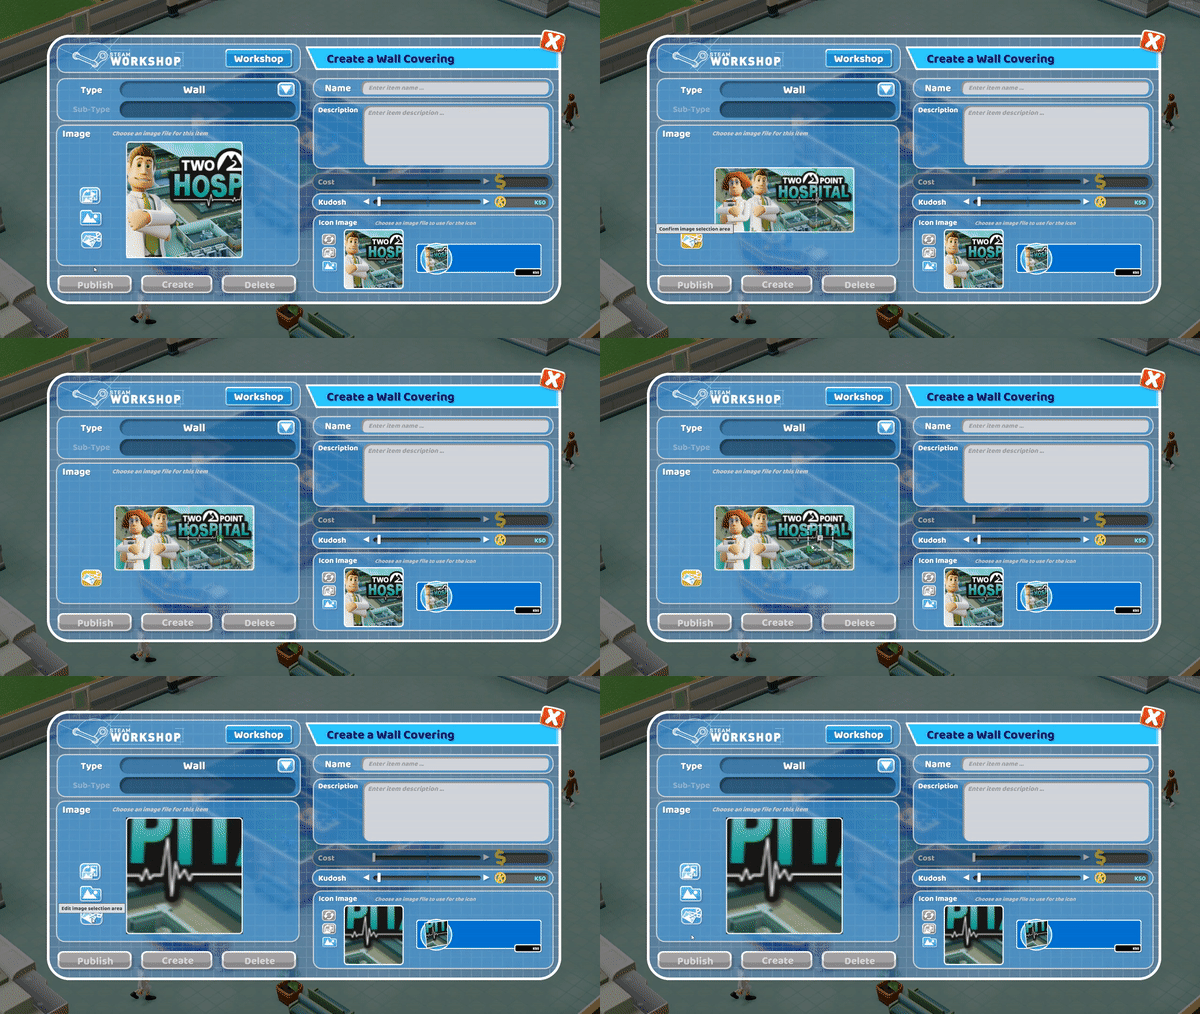
The ![]() button allows the user to select the area of the uploaded image to be seen in the custom item. By using the box provided the user can zoom in and out, or move the box to select which area they wish to be seen on their wall or floor. Once the desired area is selected, press the
button allows the user to select the area of the uploaded image to be seen in the custom item. By using the box provided the user can zoom in and out, or move the box to select which area they wish to be seen on their wall or floor. Once the desired area is selected, press the ![]() button again to confirm the selection.
button again to confirm the selection.
The ![]() button will rotate the item. Users can also rotate the icon image using the same button in the icon image section.
button will rotate the item. Users can also rotate the icon image using the same button in the icon image section.
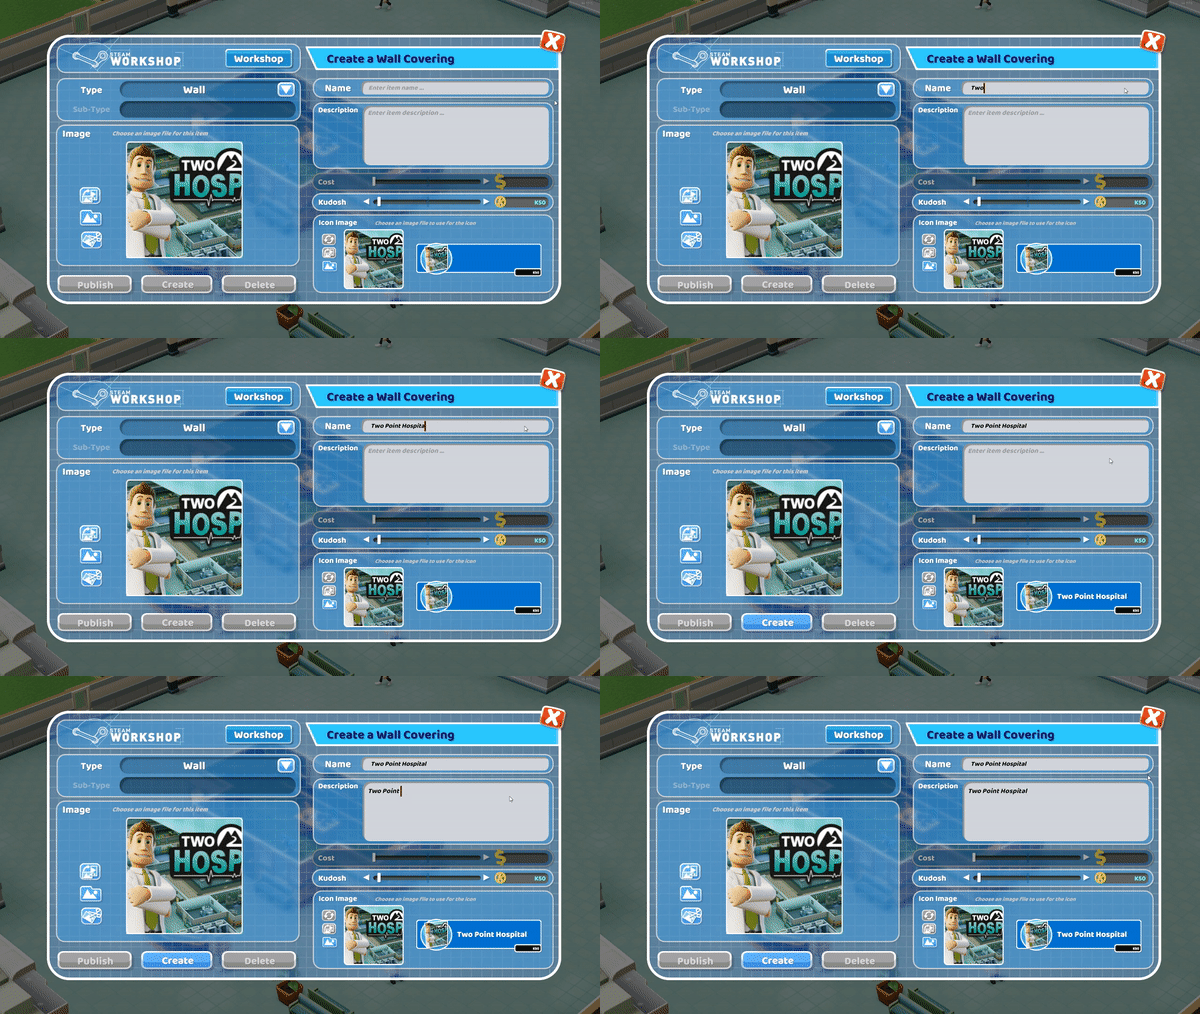
The user can edit the the Name and Description of their item using the text boxes provided.
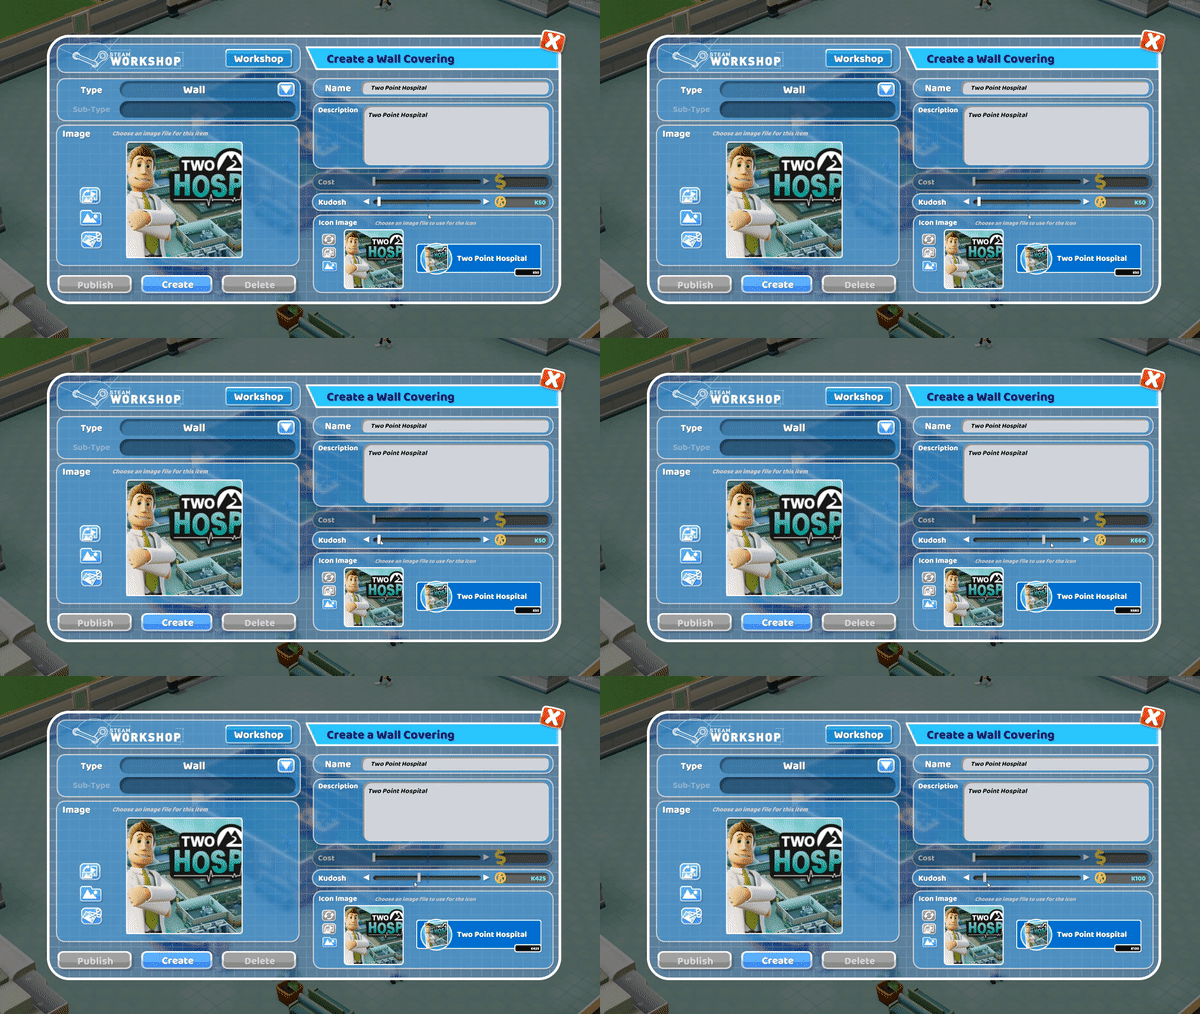
The “Kudosh” slider can be used to adjust the amount of Kudosh needed to unlock the item.
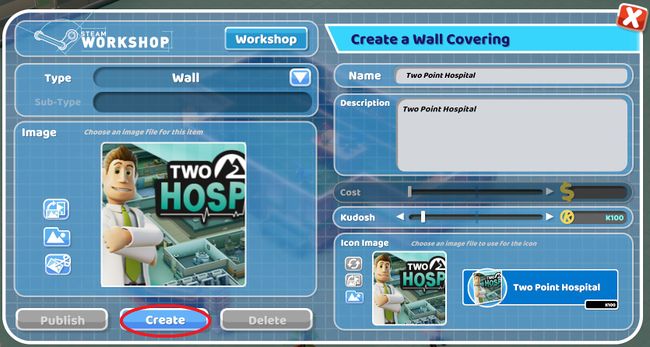
Once all options have been chosen select the “Create” button and the customised content will appear in the room customisation menu. Users will need to unlock their custom made wall or floor using Kudosh before they can use it in their hopsital.
